Creating a Protocol-Driven Trial
This guide outlines the step-by-step process for creating a protocol-driven trial using the Advanced Mode in Trial Accelerator. This mode supports automatic ingestion of trial protocols, digitization of study arms and regimens, and configuration of downstream data workflows for designated hospital sites.Trial Setup Workflow
Step 1 – Create a Trial
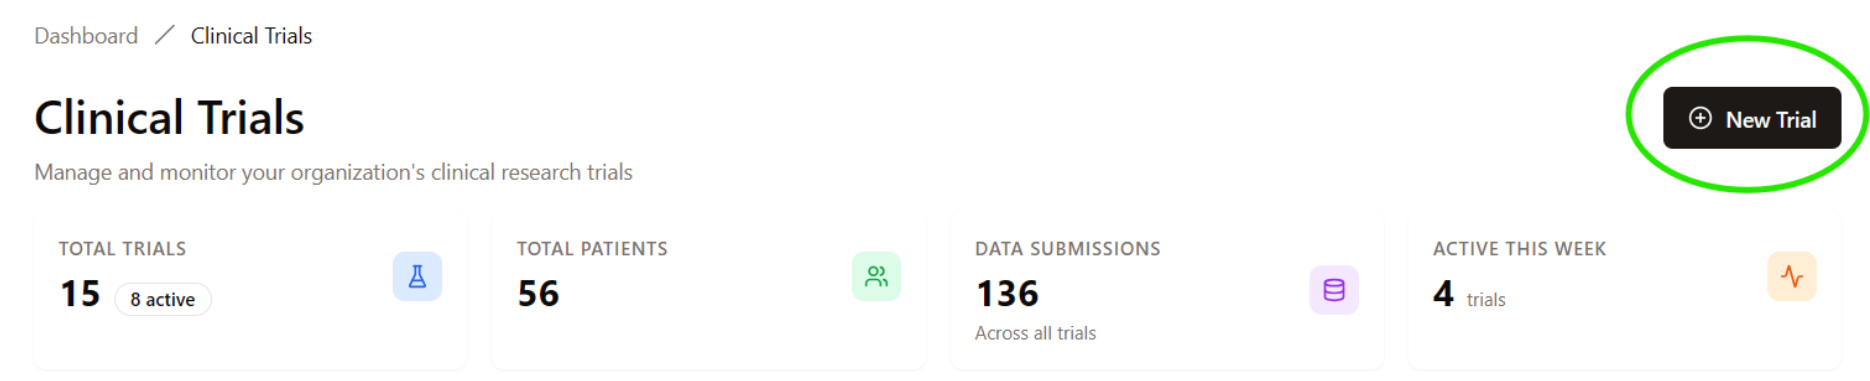
- Trial Name
- Start Date
- Description (optional)

Step 2 – Upload Protocol Document
First, select your protocol method. We recommend creating a draft from PDF.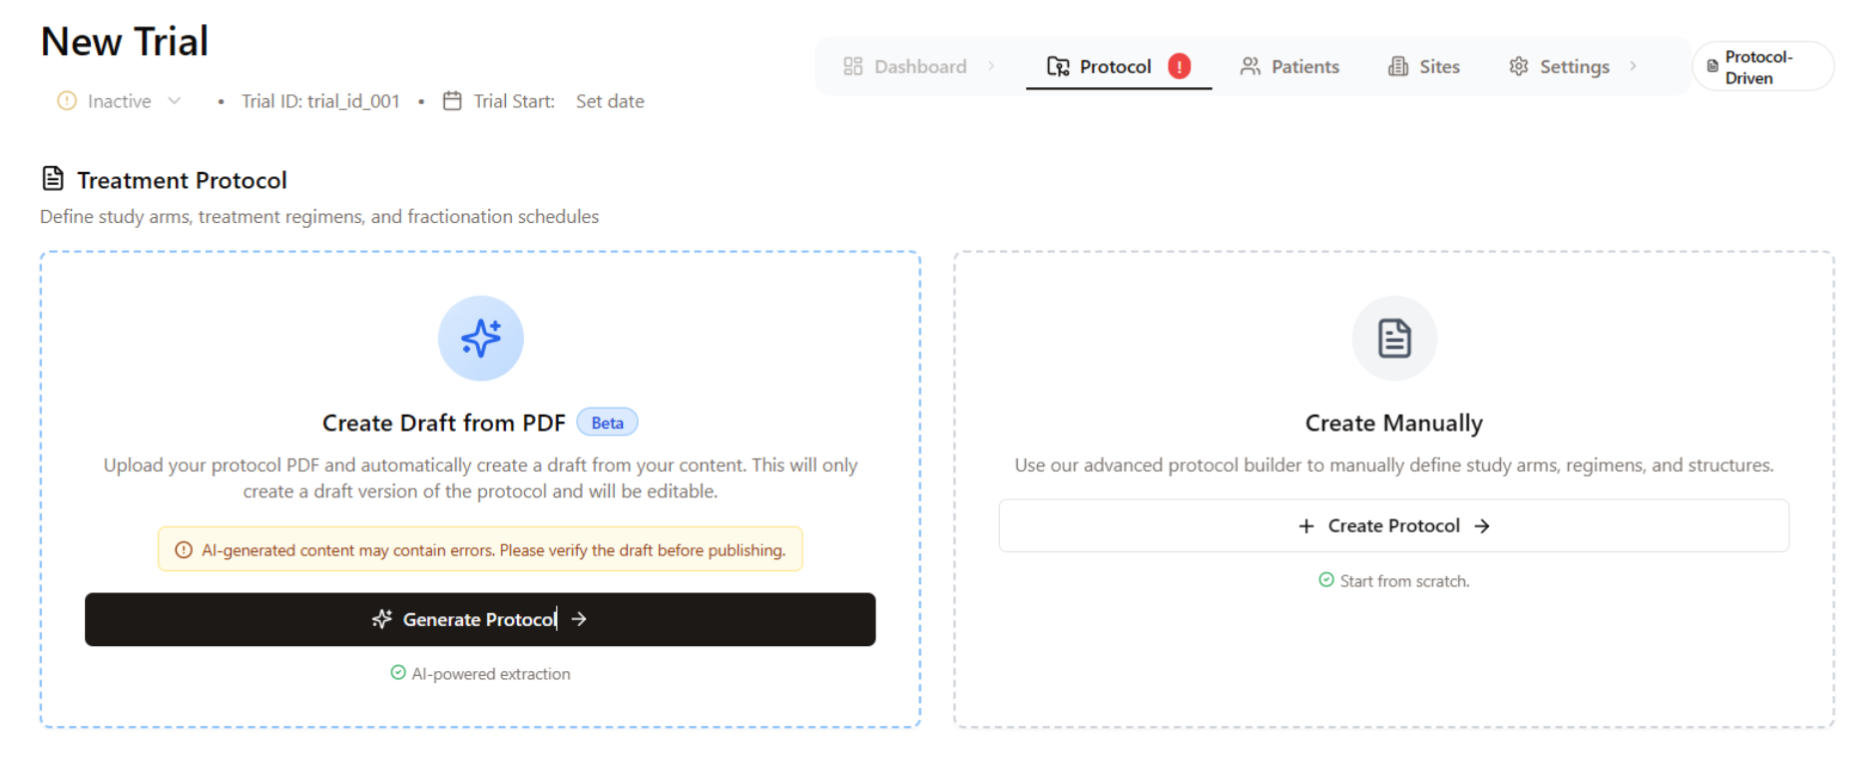
- Study arms and treatment regimens
- Dose and fractionation schedules
- Inclusion/exclusion criteria (informational only)
- Submission event timelines
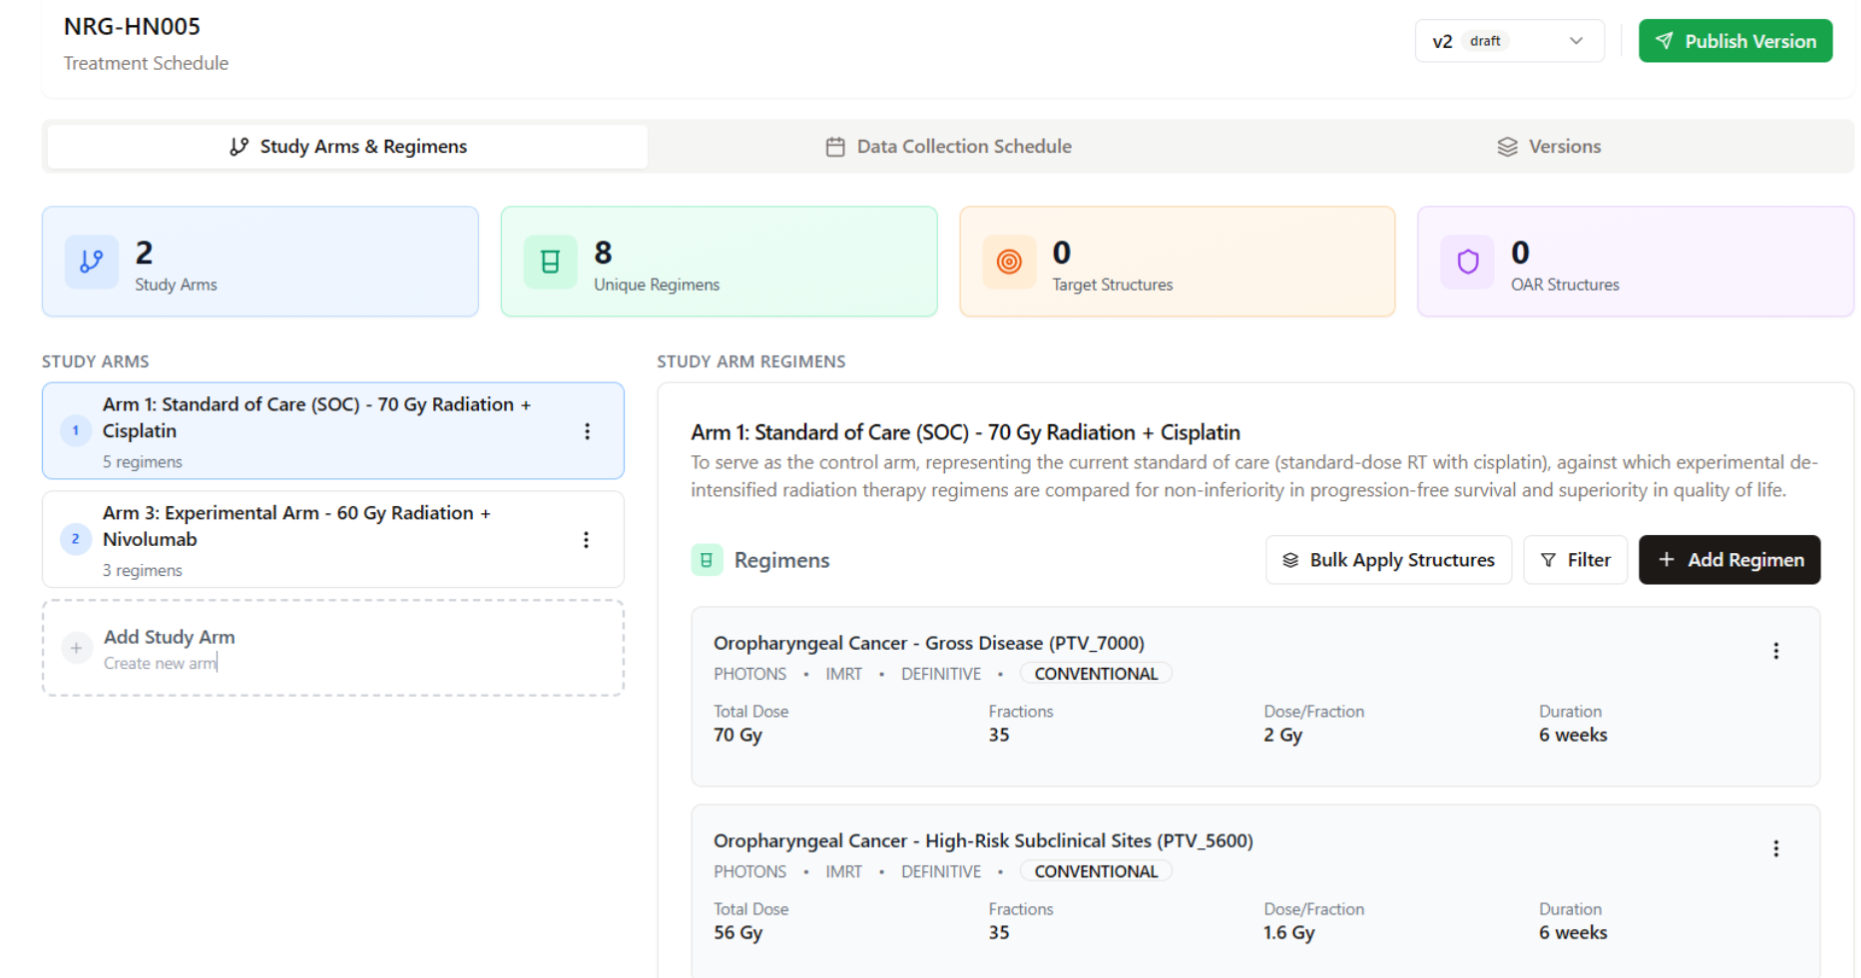
Step 3 – Confirm Study Arms and Regimens
Review the proposed arms and associated regimens. You can:- Rename or remove arms
- Adjust dose, fractionation, and modality settings
- Add new arms or regimens manually
Step 4 – Verify Data Collection Schedule
Next, navigate to Data Collection Schedule to confirm and edit the system’s parsed submission events.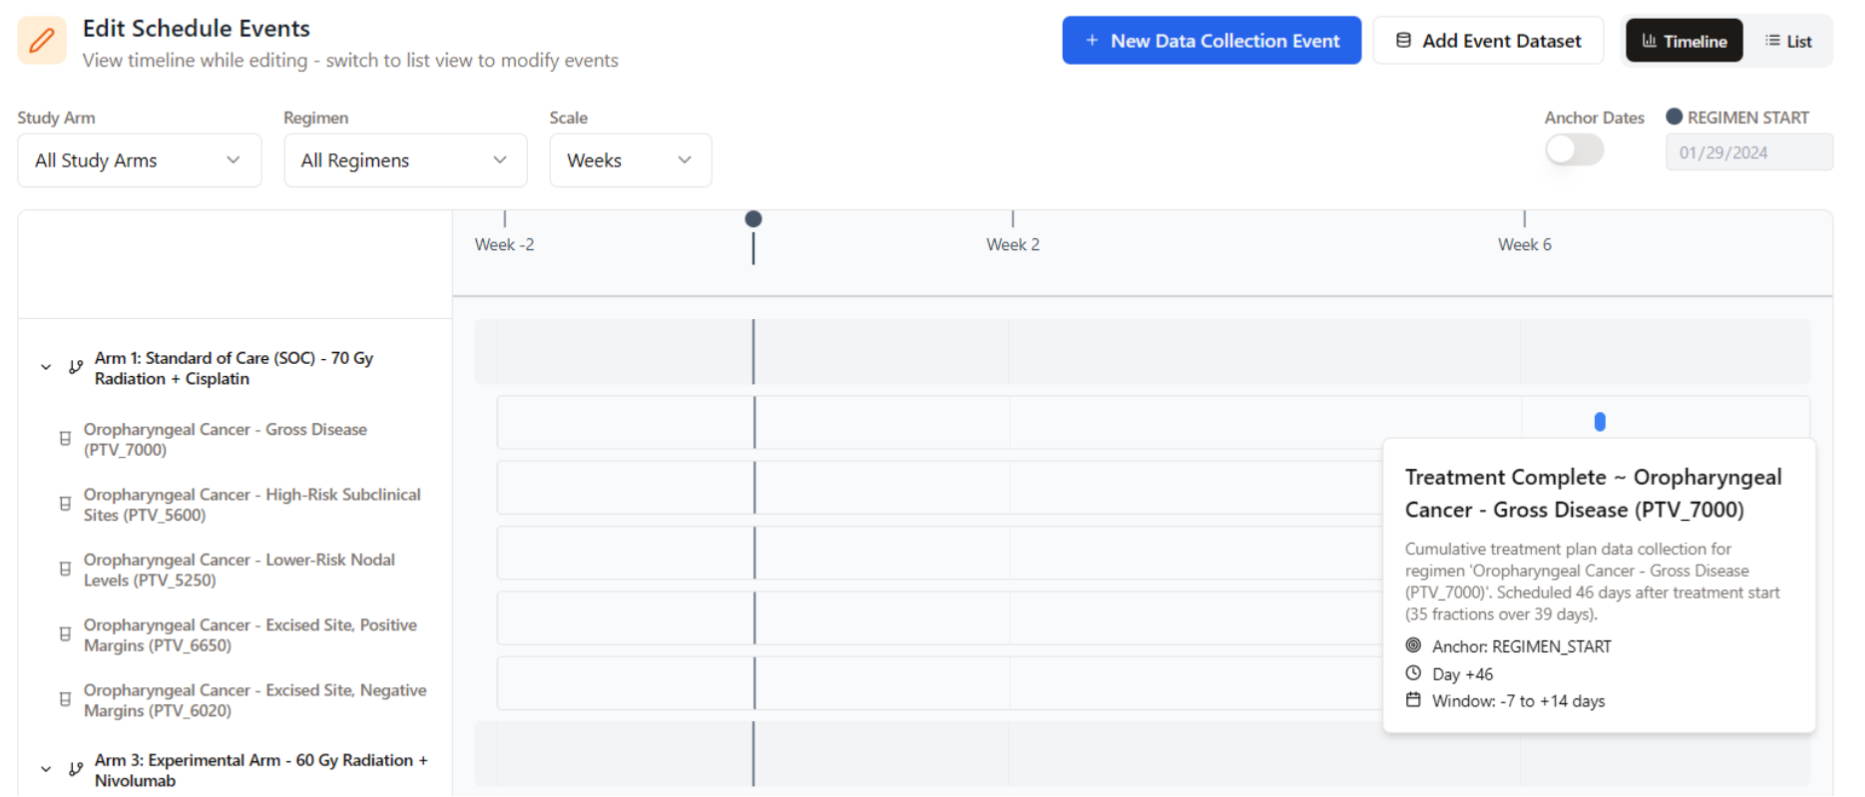
- Review the name, anticipated event information, and due date information
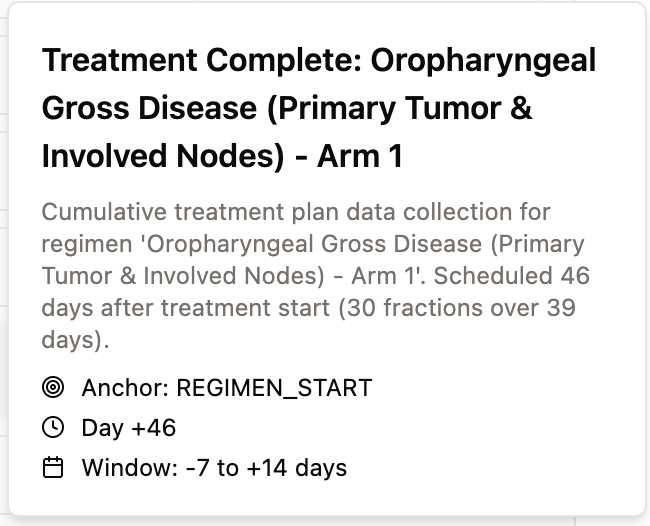
- Adjust timing windows (e.g., ±3 days) or anchor dates

Step 5 – Assign De-Identification Policy
Using either the activation checklist modal or navigating to Settings, add a DICOM anonymization policy to your trial.
- Create new policy: Define a new DICOM de-identification policy based on an Aitrium template or from scratch..
- Use existing: Leverage an existing de-identification policy which you’ve used for other projects.
Step 6 – Enroll Trial Sites
In the top-level navigation, select Sites to view your enrolled sites. To add a site, select Add Sites in the top right. Adding a site will prompt you to select an existing Aitrium Network site: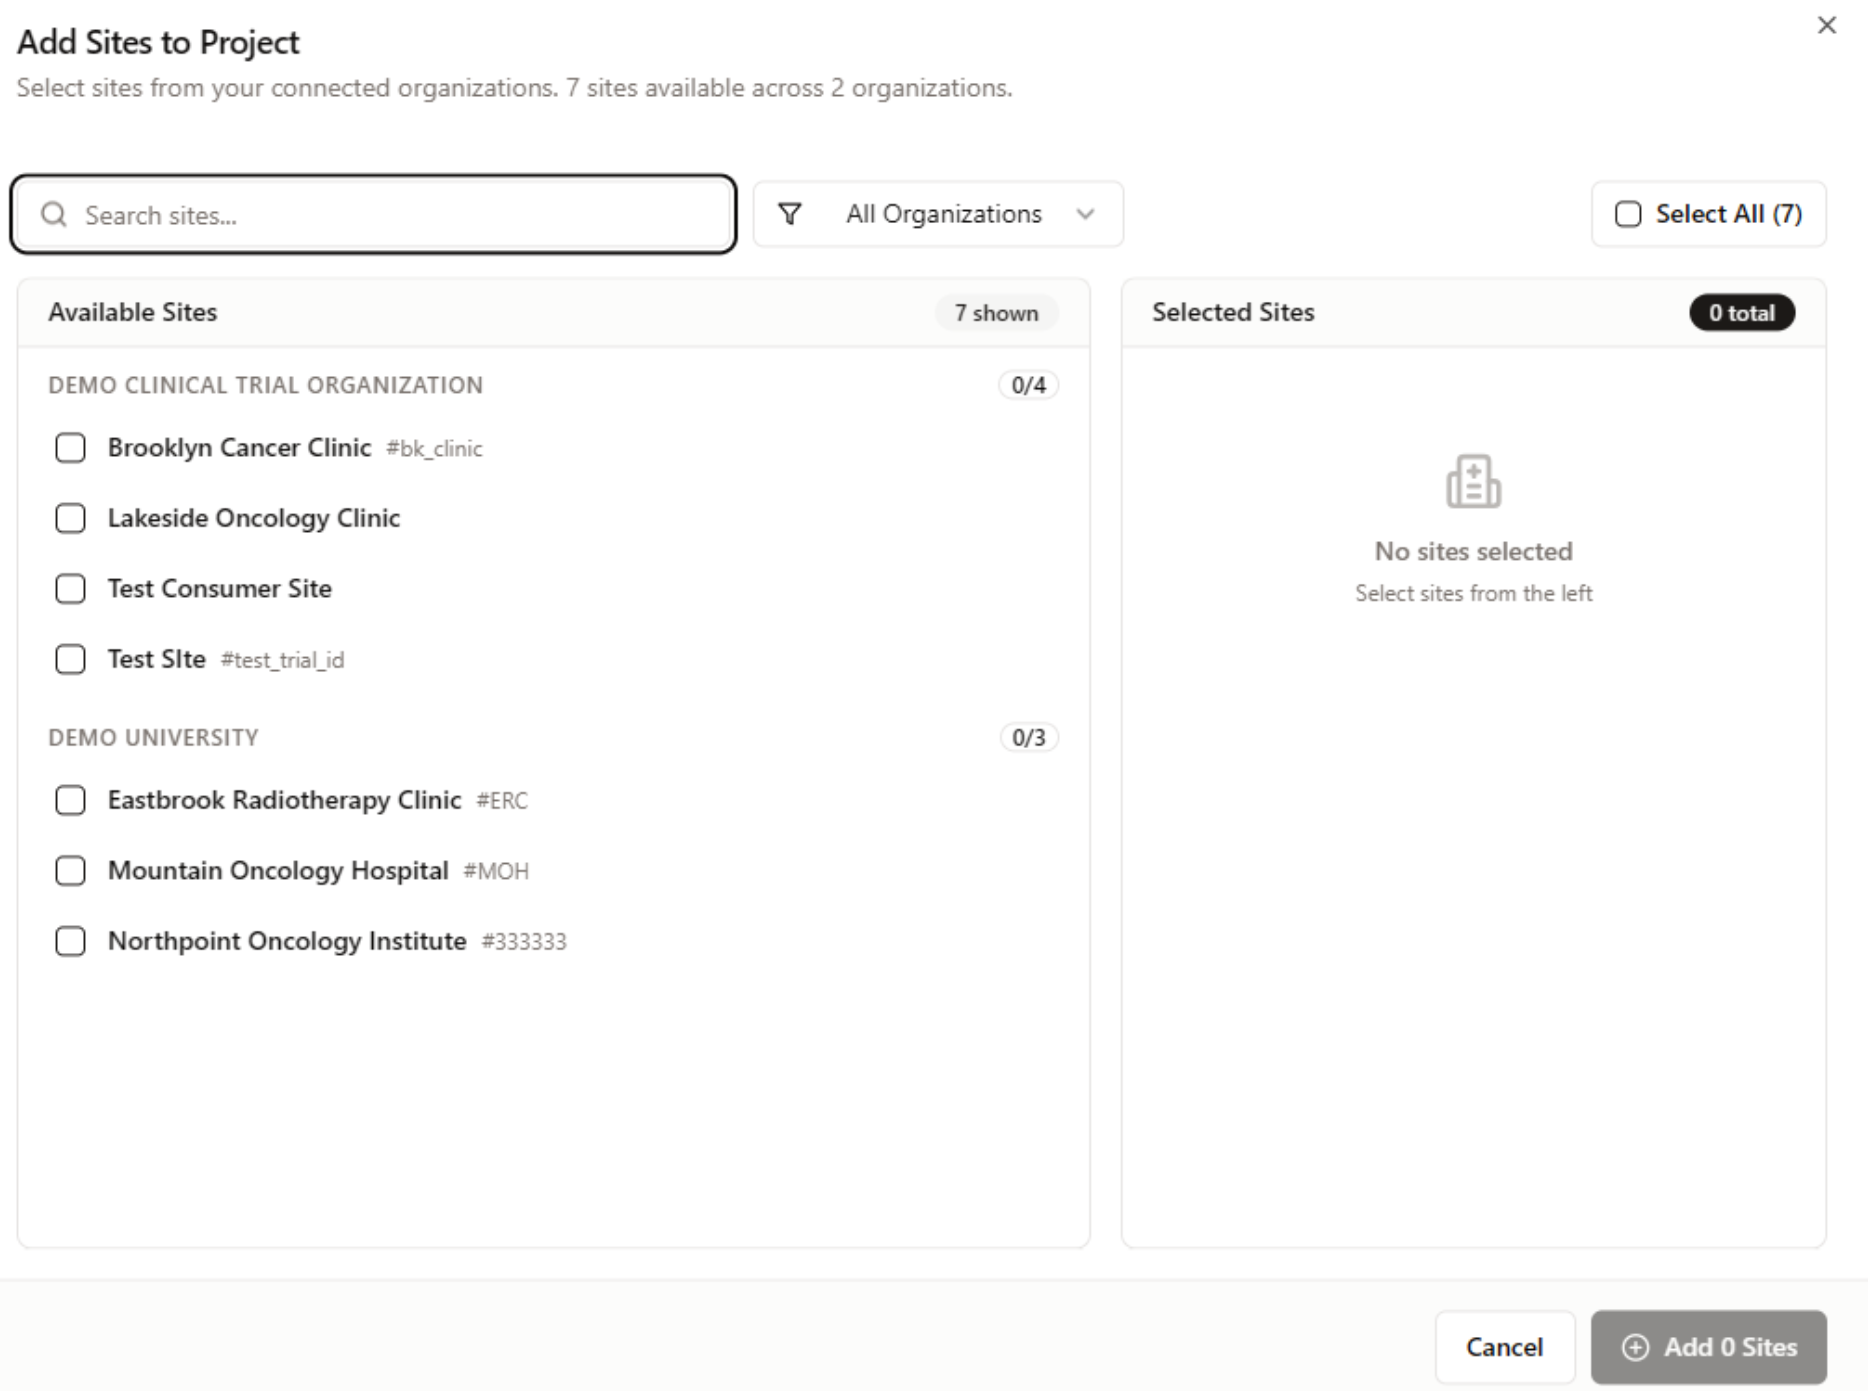
- Site Name
- Site City, Country, State/Province
- Site trial POC (First + Last name, Email Address)
Step 7 – Assign Designated Site Users
Once a site has been added, you will also have the ability to authorize site users’ upload permissions: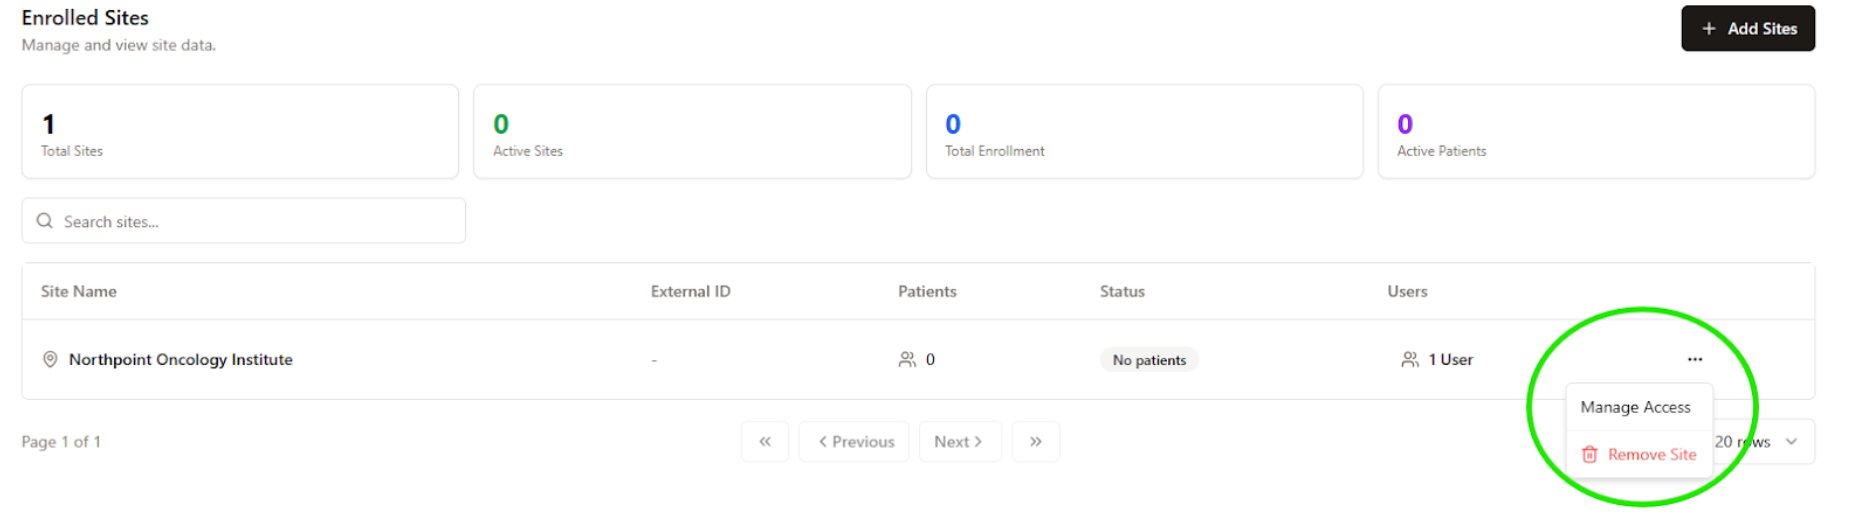
Step 8 – Configure Data Transfer Integration
The Aitrium team will configure a data transfer integration for your organization. If you do not have an integration present in the Integrations page, reach out to contact@aitriumos.comTrial Activation and Propagation
Once all setup steps are complete:- The trial is automatically deployed to all assigned sites
- Designated users will see the trial in the AitriumOS desktop application
- Upload workflows will be pre-configured based on:
- Assigned study arms and regimens + resulting data requirements
- Data collection schedules
- De-identification policy
- Structure nomenclature