Overview
User Management is accessed at Dashboard → Users. Admins can invite new users, manage existing user roles and site assignments, and track invitation status. Aitrium has two customer-facing roles:- Admin — Organization-wide access to all features, including administration
- User — Access scoped to an assigned site
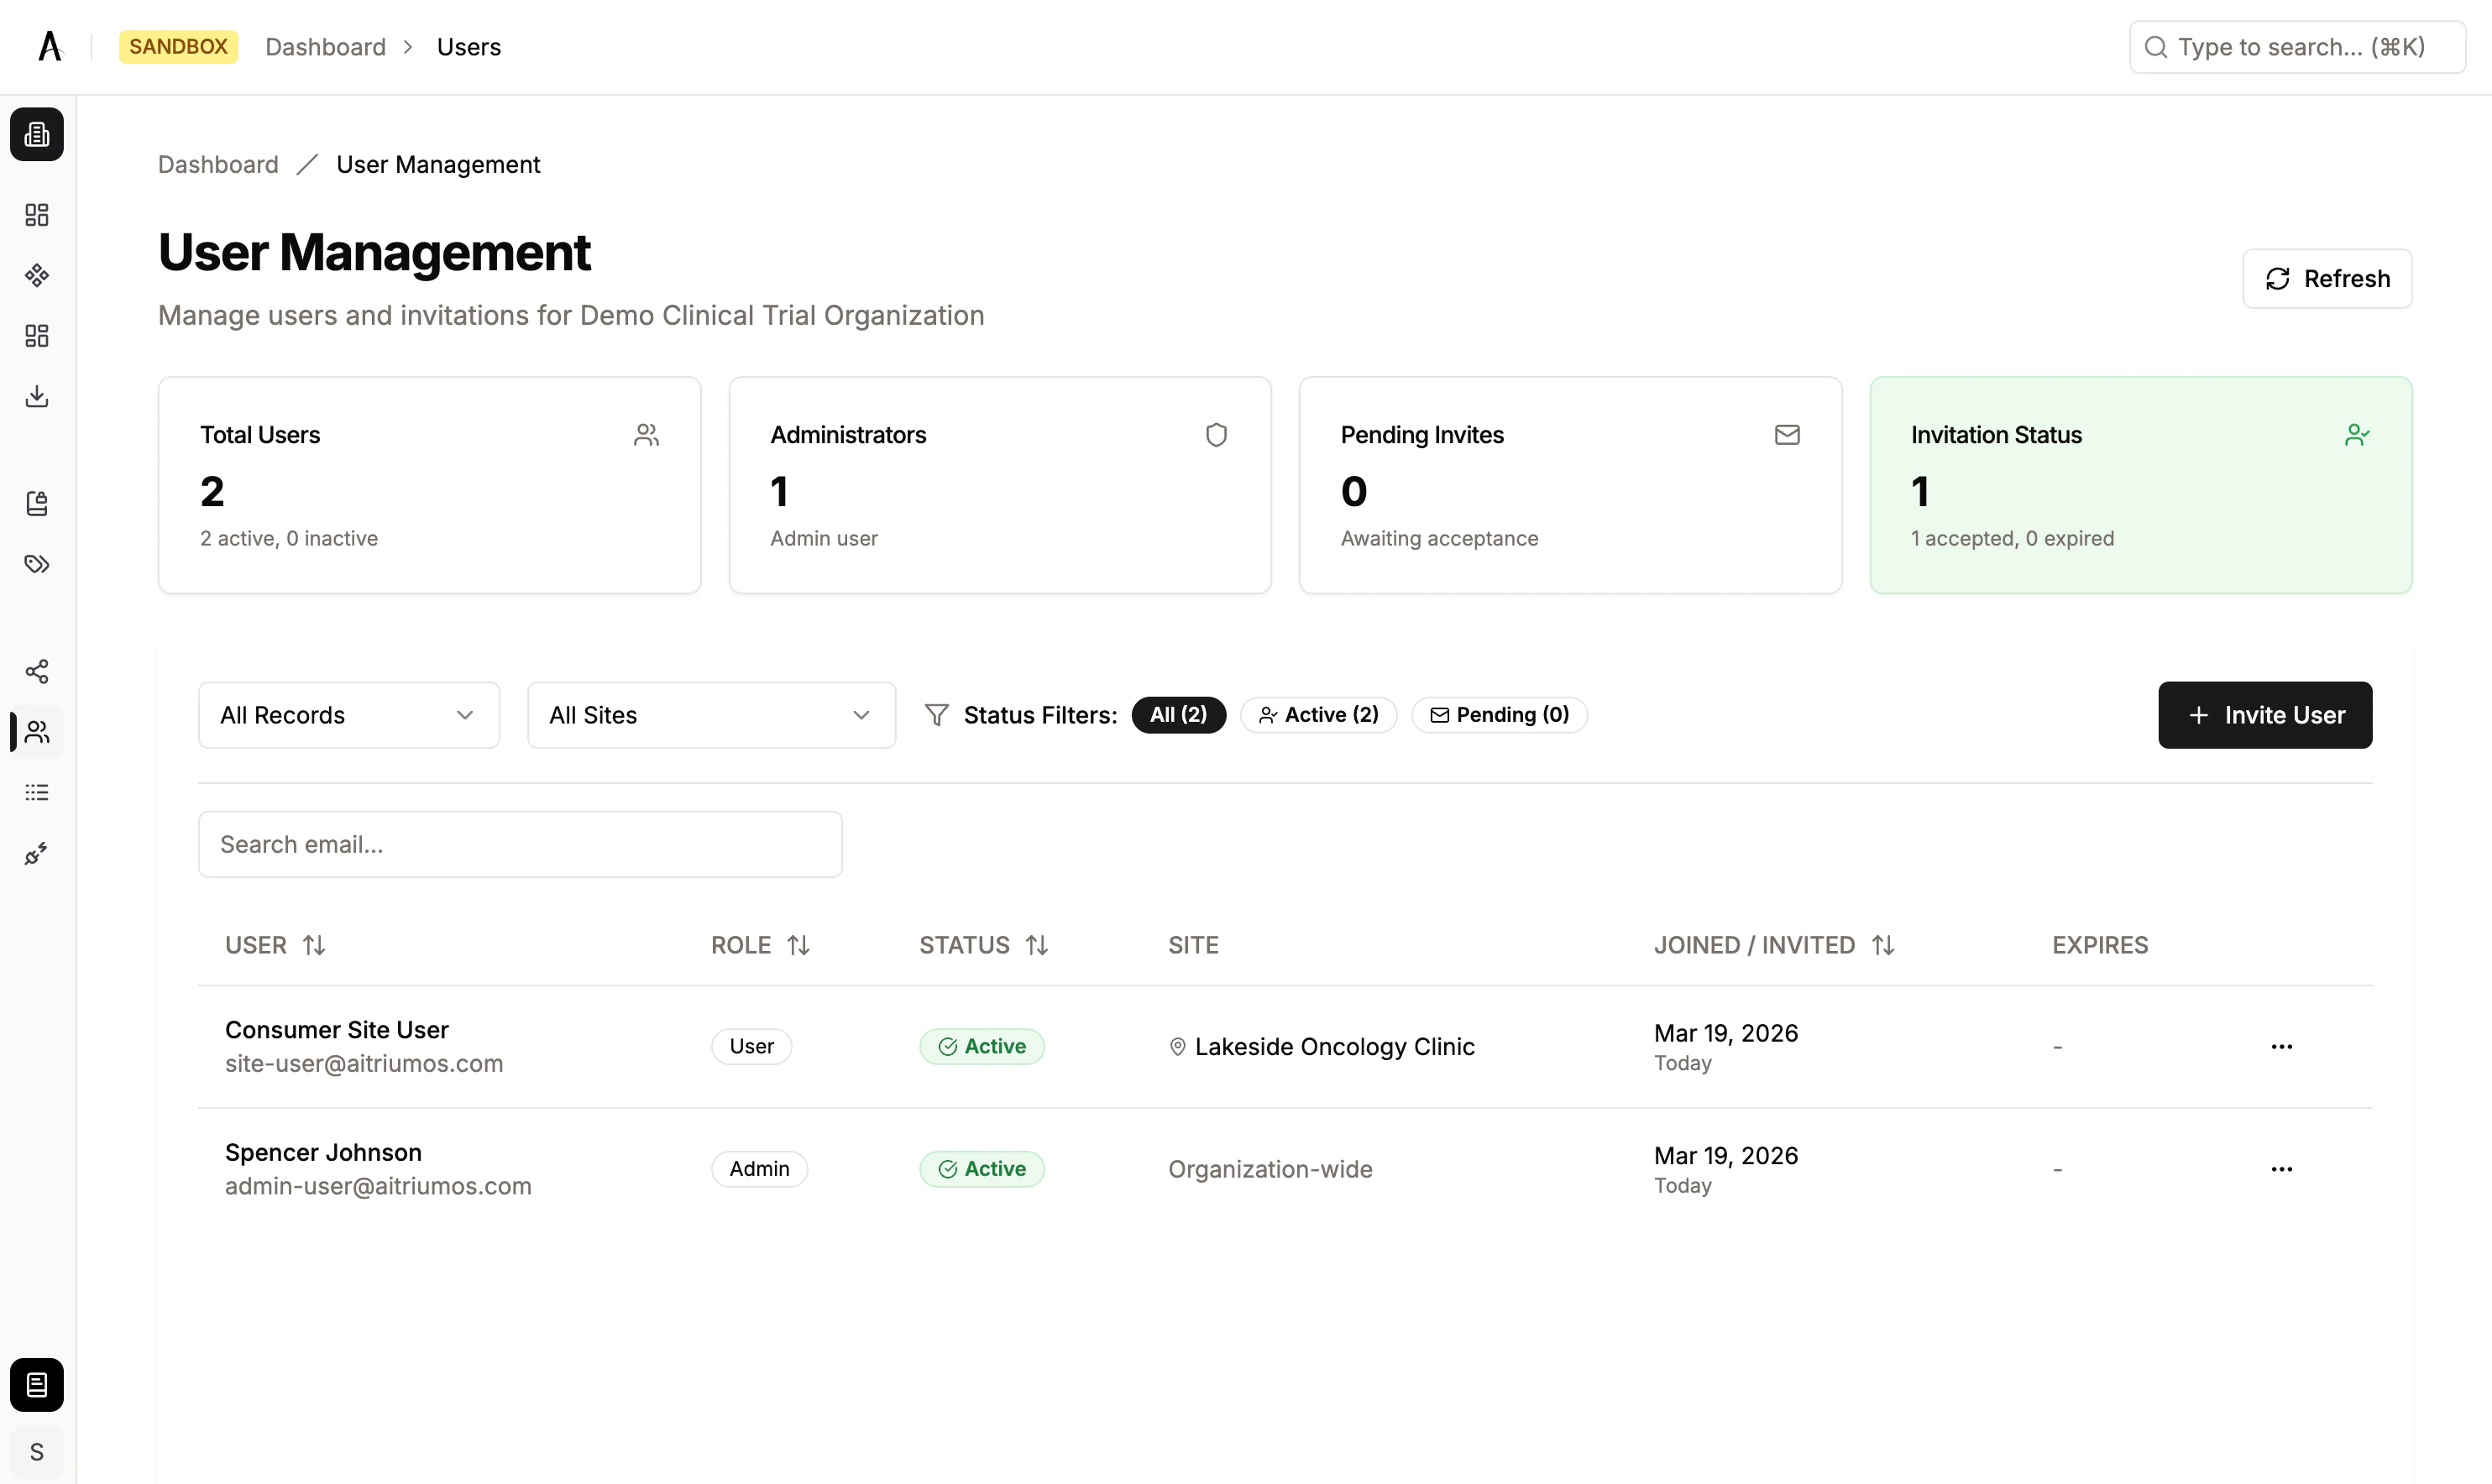
Users Dashboard
The Users page provides an at-a-glance summary of your organization’s user base along with a detailed table for management.Statistics
- Total Users — Count of active and inactive users
- Administrators — Number of users with the Admin role
- Pending Invitations — Invitations awaiting acceptance
- Invitation Status — Breakdown of accepted vs. expired invitations
User Table
The table displays all users and invitations with the following columns:| Column | Description |
|---|---|
| User’s email address | |
| Status | Active, Inactive, Pending, or Expired |
| Role | Admin or User |
| Site | Organization-wide (for Admins) or the assigned site name |
| Last Activity | Most recent activity or creation date |
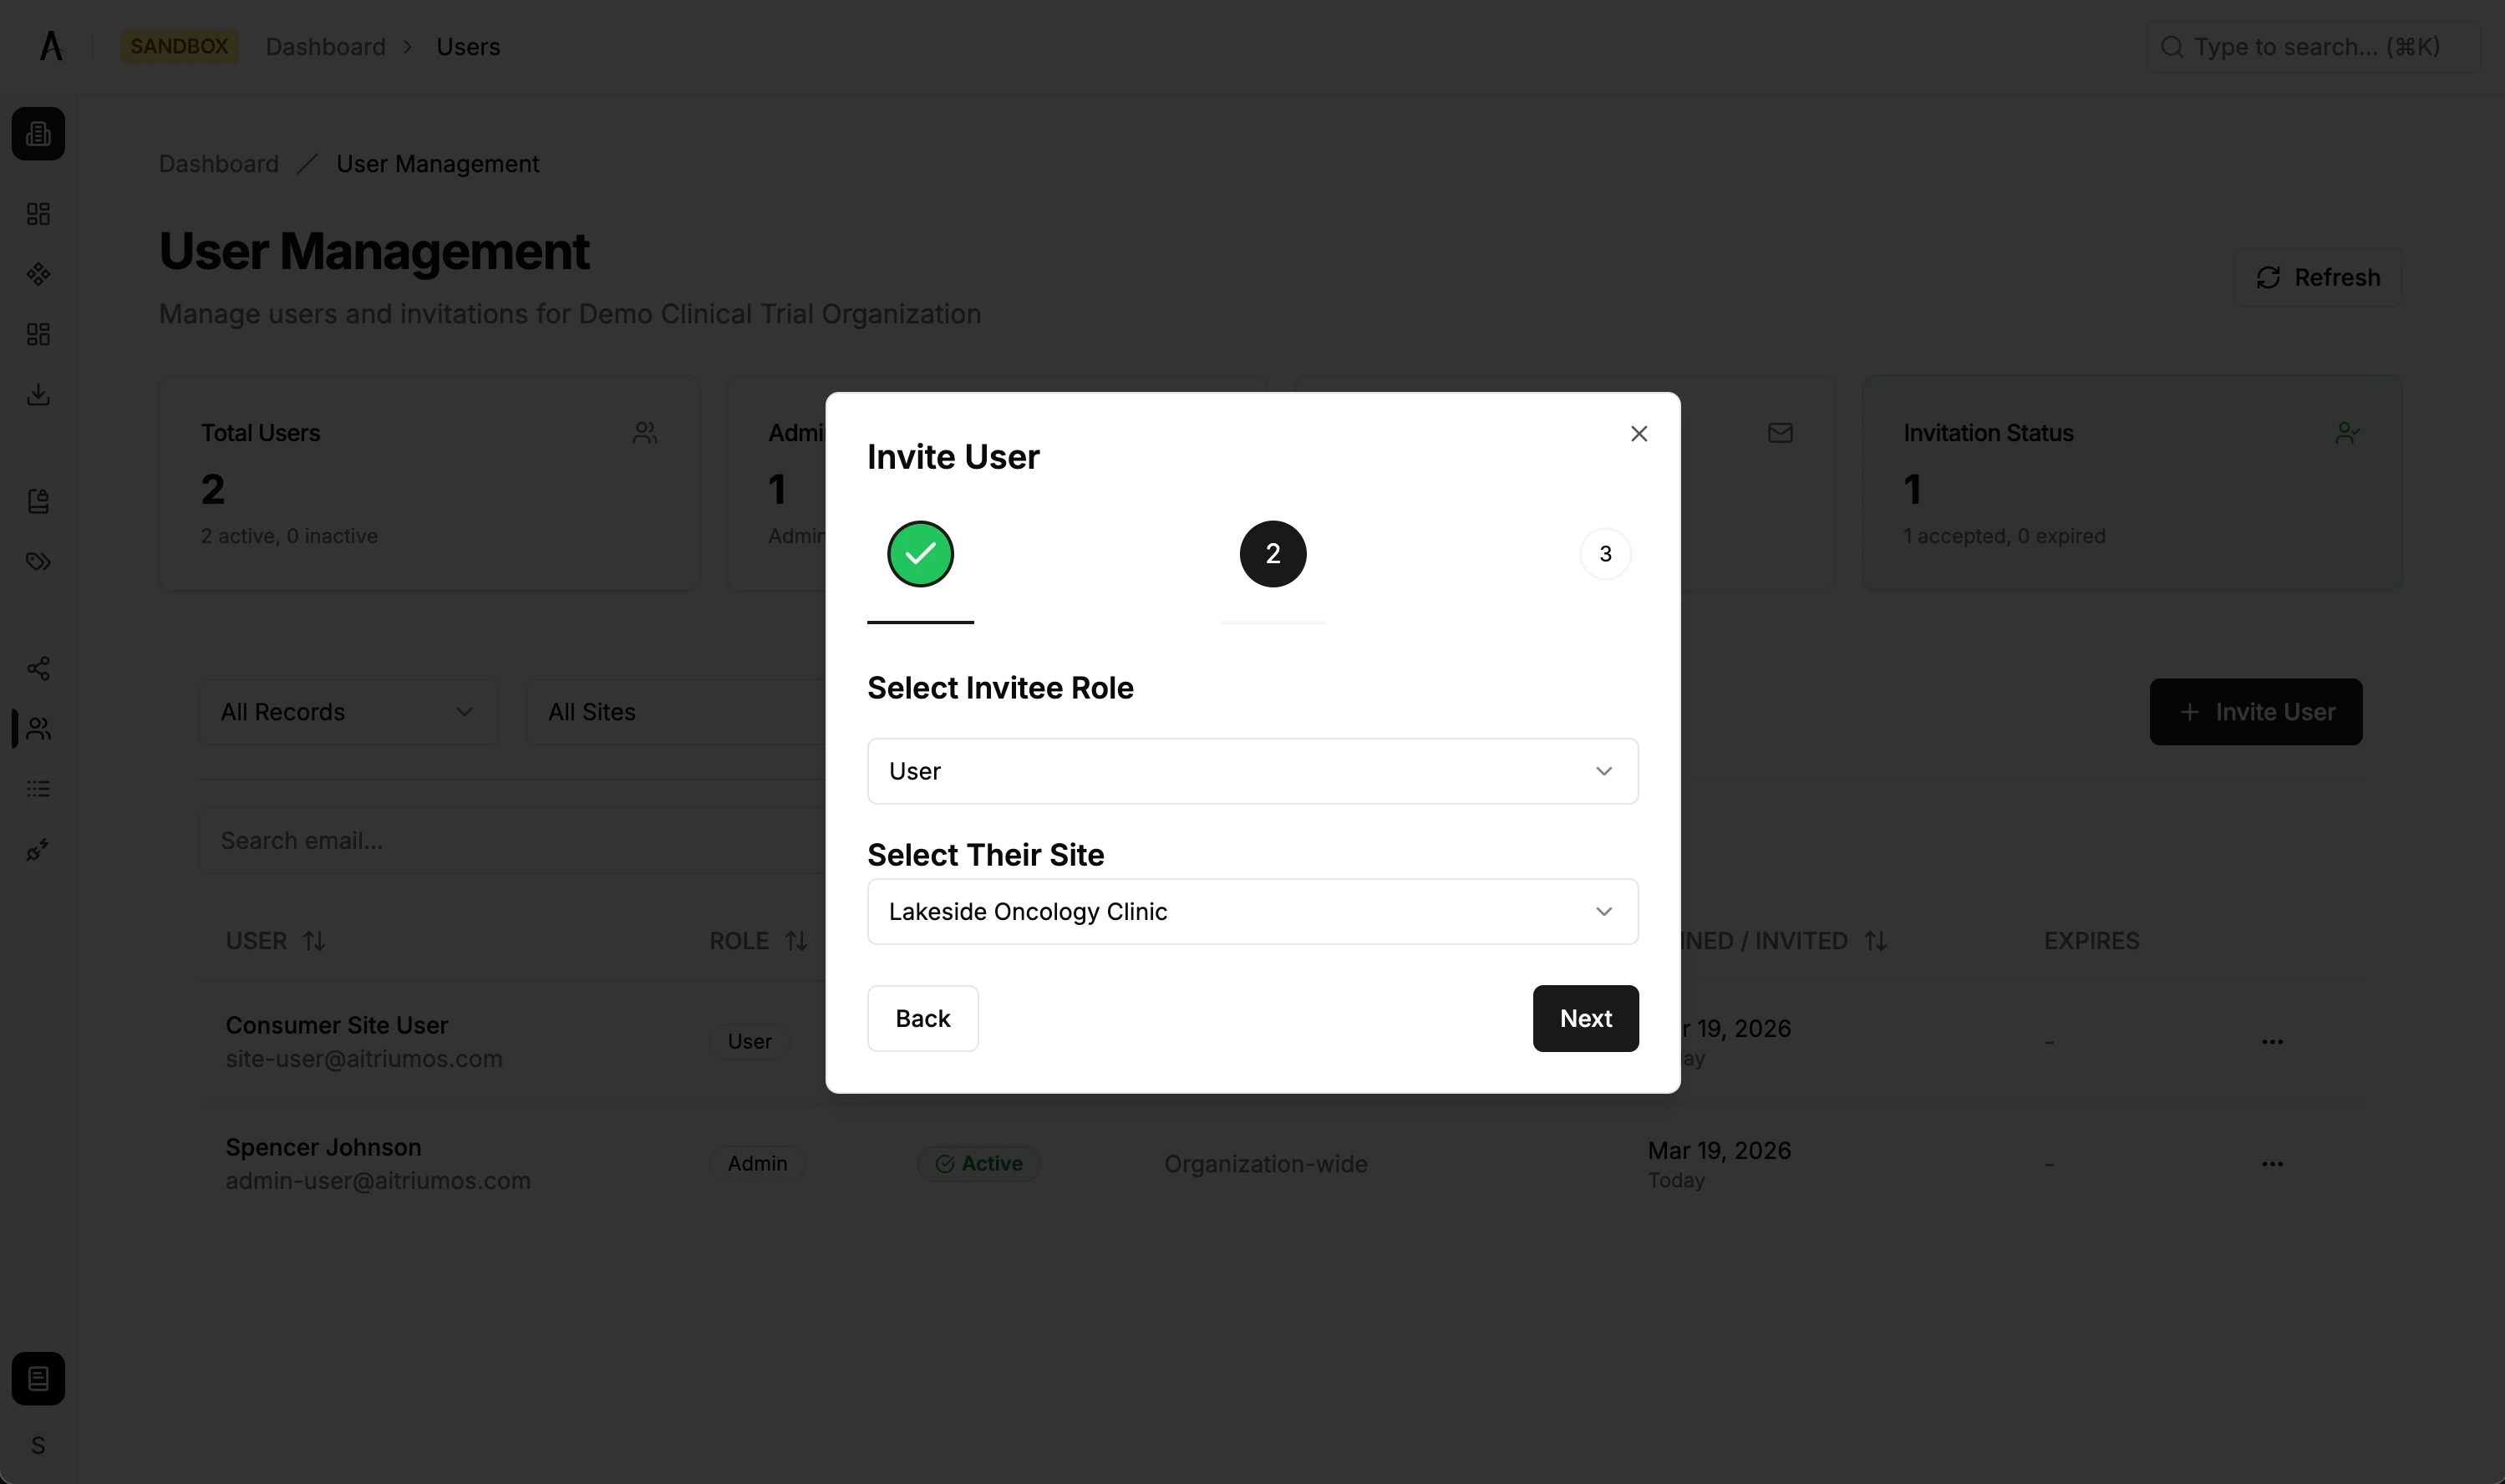
Inviting Users
Inviting an Admin User
- Navigate to Dashboard → Users
- Click Invite User
- Enter the user’s email address
- Select the Admin role
- Click Send Invitation
Inviting a User with Site Assignment
- Navigate to Dashboard → Users
- Click Invite User
- Enter the user’s email address
- Select the User role
- Select a Site from the dropdown
- Click Send Invitation
Invitation Lifecycle
- Invitations are valid for 7 days from creation
- Status flow: Pending → Accepted (user completes registration) or Expired (7 days elapsed)
- Only one active invitation can exist per email address
- If a previously deactivated user is re-invited, the system handles it as a reactivation — their existing account is restored with the new role and site assignment
Managing Invitations
Refreshing an Invitation
Refreshing extends the invitation expiration by 7 days from the current time:- Find the pending or expired invitation in the Users table
- Click the actions menu (⋮) → Resend Invitation
- The invitation link is refreshed and re-sent to the user’s email
Revoking an Invitation
Revoking permanently removes a pending invitation:- Find the invitation in the Users table
- Click the actions menu (⋮) → Remove Invitation
- Confirm the removal
Revoking an invitation permanently deletes it. If you need to re-invite the user, you’ll need to create a new invitation.
Managing Existing Users
Changing a User’s Role
- Find the user in the Users table
- Click the actions menu (⋮) → Edit User
- Change the Role (Admin or User)
- If changing to User, select a site assignment
- Save changes
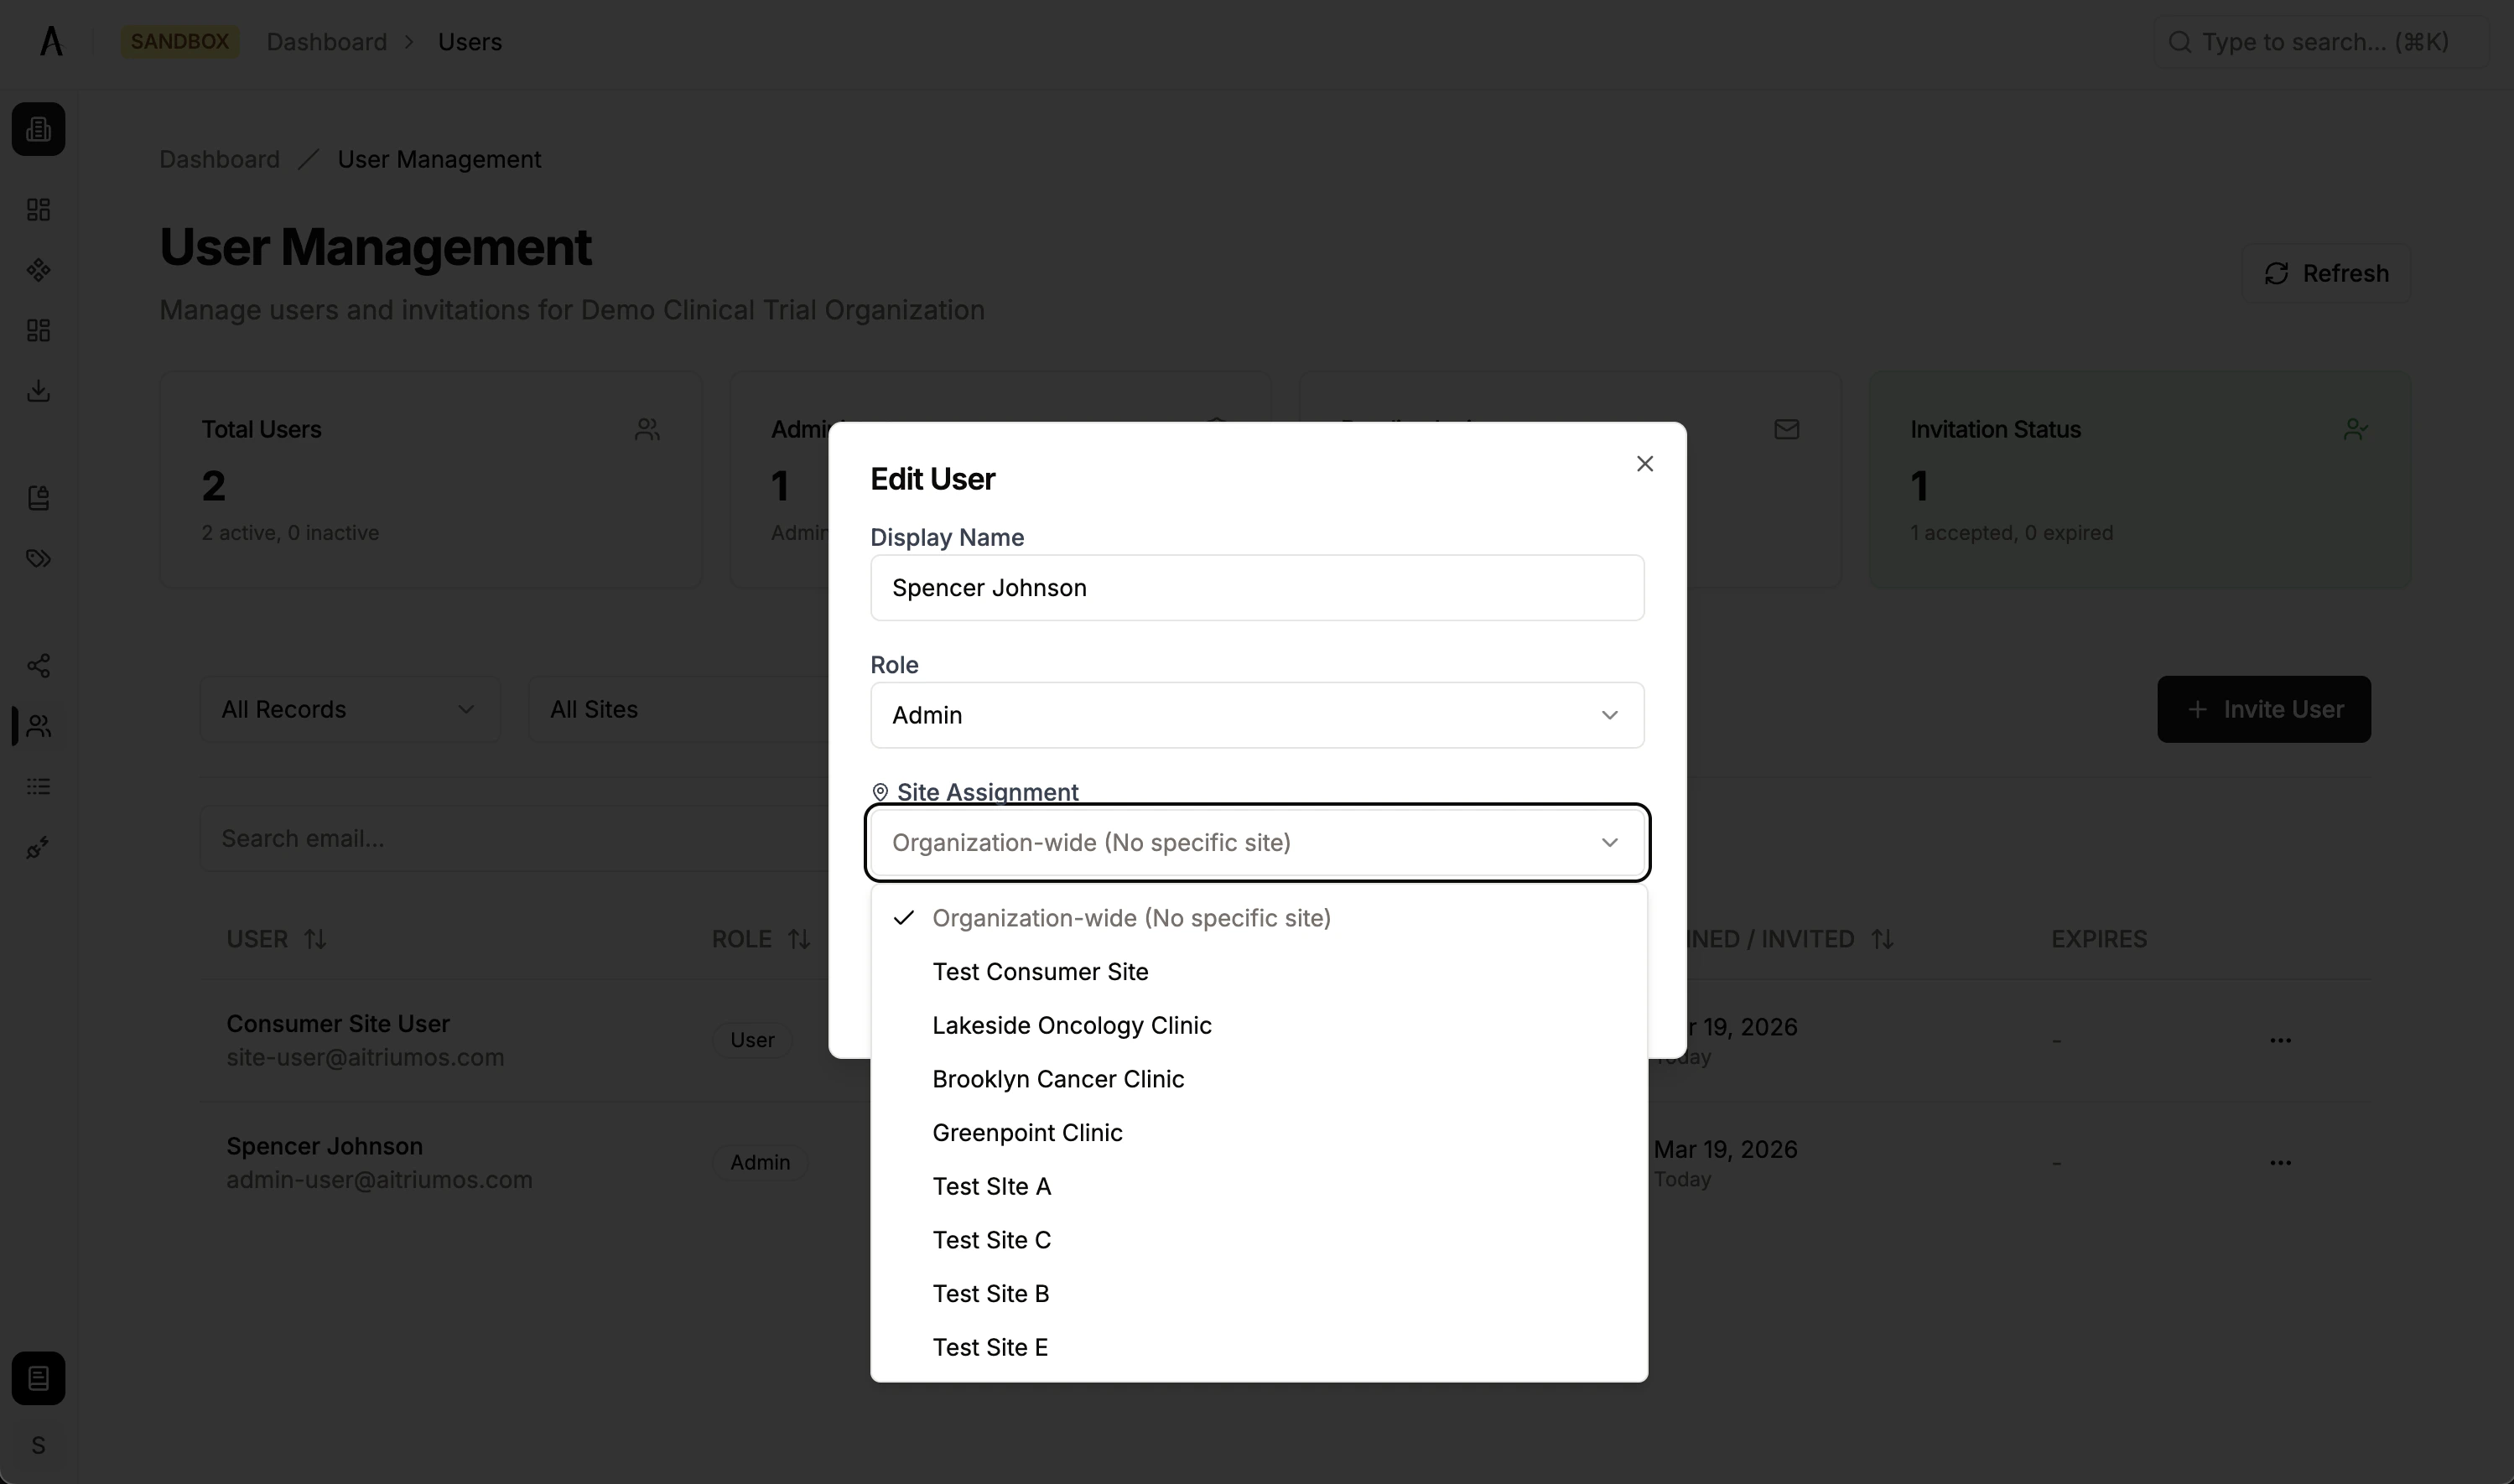
Adding or Changing User Sites
- Find the user in the Users table
- Click the actions menu (⋮) → Edit User
- Update the Site assignment
- Save changes
Admin-role users have organization-wide access and are not restricted to specific sites. Site assignment only applies to the User role.
Deactivating a User
- Find the user in the Users table
- Click the actions menu (⋮) → Deactivate User
- Confirm deactivation